Showing posts with label post processing. Show all posts

Tuesday, April 28, 2015

on Long Breaks, Backlogs and Portraits

It has been awhile since I last wrote something on this blog. I have been meaning to blog about some of my portraits from 2014 but I just haven't had the time or the motivation to do so. So while I am in a lull from shooting events and for clients, I want to write about my personal shoots last year.

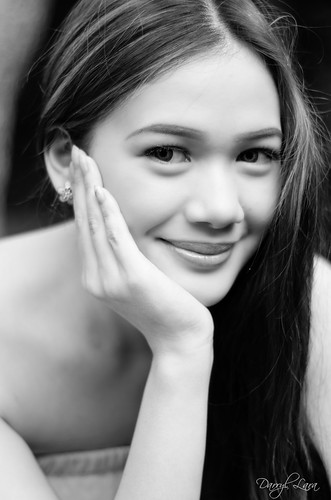
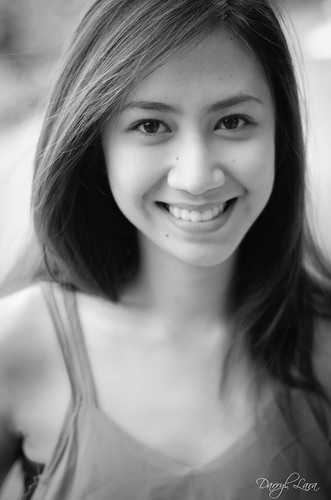
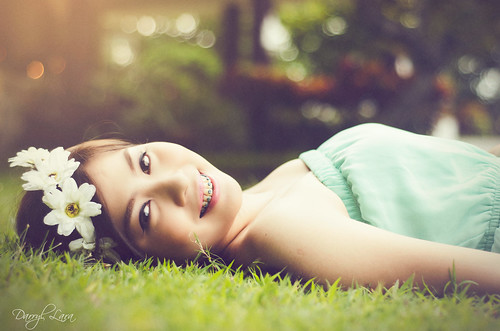
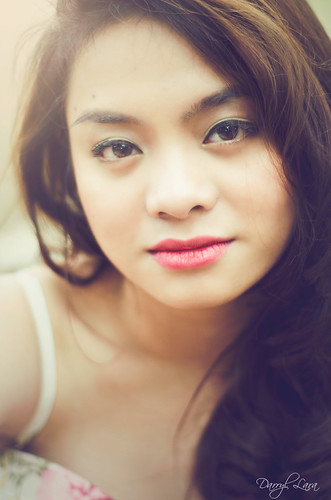
People have been asking me if I have finished my 100 portraits project and sadly I haven't. I still have to reach halfway into the project. Since I have this HUGE backlog of portraits to post, I will be publishing these five portraits that I will add to my project. These five ladies are all friends from highschool; they went to the same school as me. And I did all had their "pre-debut" portraits. All the photos were taken last year during "pre-debut" portrait sessions. I like working with them as subjects because the shoots are all light-hearted and fun. I guess photography is the one aspect of my life where I perform best when not under immense pressure.

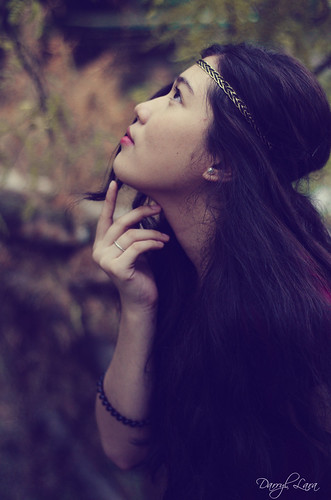
It was also from their shoots that I got the hang of post-processing with the colors I use now. I got so used to the workflow that I have been applying it to all my shoots with people regardless of it being a portrait or an event. The vintage purplish / yellow / sunset hue is now an identifying trait of my portraits; call it my signature style if you want. I want to continue developing this workflow until I a master it.

Here are the five portraits I am adding to my collection...

Portrait #40: Annalou
gap (2 of 3)

Portrait #41: Rin-rin
rinrin (2 of 5)

Portrait #42: Mary
jill + mary (1 of 10)

Portrait #43: Ella
ella (2 of 2)

Portrait #44: Jill
jill predebut (5 of 27)

PS: I will hopefully be shooting a few portrait sessions before the summer ends. If anybody is interested, do send me a message in facebook, twitter or instagram.

PPS: Speaking of instagram, I added a widget on the right for my instagram feed. Follow my mundane not-so-artsy photos of everyday life there.

Wednesday, August 13, 2014

on Hiatus, Comebacks and Portrait #39

Finally, I'm back after a seven month long hiatus. Well, I took a break from blogging but not from photography. I just did not have the time to update my blog since I was busy with all the other things going on in my life.

Much has changed in the last seven months. I quit my day job, started working professionally as a photo retoucher and I have been shooting for clients more. Now that I found some time in between projects, I want to update my blog with some of the photoshoots that I have done the past few months. And I also want to update my portrait project.

gap (1 of 1) 
Paulyn and Kezia

My first feature will be of my good friend and makeup artist Paulyn. We did several shoots the past few months and this one is with her friend Kezia. We did a shoot for Kezia before, but I am featuring this one because we got it right this time around. And ofcourse there is that mandatory portrait of Paulyn as well.

Paulyn and her flower crown 

During the shoot I worked mostly against the light as it was a particularly sunny afternoon. I added a slightly purplish haze during post processing to balance out the yellow and orange cast of the sun. Interestingly, I find adding some sort of haze effect to make portraits appealing. I like the “vintage-ish” look I get.

Kezia's angle :) 

And as promised, I am adding this portrait to my project.

Portrait #39: Kezia

PS: Thanks to Paulyn, Kezia, Fatima, Junah and Annalou for joining me in this shoot. I'll be posting Fatima's photos next. :D 

Tuesday, March 25, 2014

on Revisiting Chesca

It has been a long while since I last had a blog entry. I've been busy with so many other things lately that I found it difficult to find time to shoot and write. I am also preparing for a massive career change that is to come at the end of summer. Well, I do hope I can find time to write about the photos I took since my last entry.

For my comeback blog, I revisited the photos of Chesca. I was looking for photos to apply some new things I learned about post processing and I tried it on some of her portraits. I was inspired by the works of Emily Soto and I tried my best to replicate what she was doing. I must say, I am kind of enjoying the vintage and dreamy feel of her portraits. It would be a good addition to my traditional portrait post processing techniques.

new vintage (1 of 1)
 warm tone vintage...

It can be sometimes daunting because of the number of layers I have to create to capture a certain look; this is on top of my usual workflow for portraits. The additional work though is well worth it. Gone are the days of just clicking the "convert to black-and-white" button when I do not like how the colors work. And now, I have more options when I get bored of my "safe" post processing workflow.

chesca_vintage (1 of 1)
 cold tone dreamy look...

I think the new look of the portraits fit my style. The subtle colors, dreamy feel and vintage vibe are more or less what my portraits are about. I will see what other portraits I can apply this style to.

PS:

A few days after finishing the two re-worked portraits, Chesca won the Mutya ng Dabaw pageant. It is probably the biggest and most prestigious pageant in the city. I am really proud to have met her and to have taken her portraits before she became Mutya ng Dabaw. She is the second Mutya I have in my portrait project.

PPS:

Today is also her birthday. Big shout out to the birthday girl! Happy bday Chesca!

Tuesday, November 5, 2013

on Overcoming the Creative Block, Patience and Portrait #38

It has been awhile...

I am back from almost three months away from blogging. My day job got a lion's share of my time and sapped all the enthusiasm away from me. There were times when I found myself lost and devoid of creativity. Even taking photos became a chore of sorts.

new (2 of 4)

Getting over the creative block meant taking time away and doing other things. I rescued my guitar from the back of the closet, bought a pen and a sketch pad, and did some experimenting in the kitchen. Focusing on other things helped me ease myself back into doing what I love to do. I am sure a lot of the people I know who share this hobby with me have their own stories to tell about how they fell out and back in love with photography.

new (3 of 4)

The first thing I did when I felt I got my mojo back was to finish editing a set done two months ago for my friend's makeup portfolio. Paulyn invited me to shoot Hanna, who was on vacation in the country, for her blog. It was such a blast working with the two of them. Paulyn did a splendid job with the makeup and Hanna was very easy to work with. I'm glad I took this shoot even on short notice since this will probably be my only chance to get to have Hanna as my model.

johanna (1 of 2)

I would probably avoid using my macro lens the next time I shoot portraits in a studio(ish) environment next time. Post processing is such a pain when using the macro lens; too many unwanted fine detail. It took me hours to finish cleaning things up.

b&w (1 of 1)

It took a while for me to publish the set but in the end it was worth it. One thing I learned during this shoot is that I should always be patient and not be in a hurry when I am shooting or retouching. Patience is not a part of my vocabulary but I learned that you cannot rush things when you seek aesthetic satisfaction. Creativity will come in waves. Sometimes it consumes you until you run out of energy and other times it dries up even when you desperately need it. What matters is that know when you have it and that you make the most out of it when it's there.

Portrait #38: Johanna
new (1 of 4)

Well, there you have it. Another set published and another portrait to add to my project. I will hopefully write another blog in the next couple of days. 

PS: A big thanks to Paulyn Dy for always trusting me to shoot her portfolio and to Hanna for being an awesome model!

PPS: Hanna's portrait just went popular in 500px.com an hour after I uploaded it. Oh happy day!

Saturday, June 8, 2013

on Workshops, Backlogs and Grain

Having backlogs has always been a part of my photography and blogging life; come to think of it, it is a part of my daily life as well. There is no shortage of things to do and stuff to place in the back burner.

portraits (2 of 2)

Anyhow, I found some time to publish this long overdue set for my good friend Waqui. She's no stragner to this blog as she's has a number of photos here. One good thing I like about her is that every time I get a chance to shoot her, she gets prettier and prettier; and this shoot is no exception. She always finds ways to level up whether it be her fashion statement or her looks. And it is never boring when she's around.

workshop (1 of 2)

I took this photos during the Photobombers / FPS workshop with the Philippine Institute of Architects as sample photos for the participants to have some sort of idea how I shoot. I took only a few shots and mostly during times when they stop shooting either to change pose or location. I'm glad I had some good shots even though I only took a fraction of what I usually take during photoshoots.

workshop (2 of 2)

The post processing is again film inspired since it goes with the retro / boho / vintage theme. I like the old film look. Grain is always good in my book. I edit the matte film look using the S-curve slider in lightroom and I think I'll be doing more filmy looking photos in the near future.

portraits (1 of 2)

PS: Thank you to the Photobombers crew / FPS people and the PIA for making this workshop for a cause possible. To Waqui and LA for being great models. And also to Iris for the awesome styling and makeup.

Tuesday, May 21, 2013

on Typhoons, Workshops and Portrait #36

Last December, Typhoon Pablo hit the western part of Mindanao and the damage was really significant. A lot of people died and a lot more are left homeless and trying to rebuild what was left of their lives. Some of the people from the Photobombers thought that it would be good to come up with an activity that would help the school kids of Compostella Valley. There was a school that had to be rebuilt from the ground up and they decided to help the kids by providing much needed school supplies. So a workshop was set to benefit of the Corazon S. Aquino High School in Compostella Valley Province.

I was fortunate enough to help during the basic portraits shoot by guiding the attendees on how to shoot portraits. I got off a few clicks while multitasking as I was often holding the reflector as this was an ambient light shoot. And it has also been a long while since I had a proper portrait shoot as I have been focusing on macro photography lately.

The set I am posting is from my takes of L.A. as I was helping out during the portrait shoot. Most of the shots were taken as examples for the attendees to follow and while I was holding the reflector. L.A. was really game in posing for the participants and it was great working with her. The theme was Boho inspired so I did the post processing to look a bit 70's as well. The entire set was done in ambient light with the Tamron 90 f2.5 and the Nikkor 50mm 1.8 AFD.

pano (1 of 1)

b&w (1 of 1)

And after a five month hiatus, I finally add another portrait to my 100 portraits project. And I must say, this one has inspired me to shoot portraits again.

Portrait #36: L.A.
portrait (1 of 1)

I am glad that I found the time to help out the crew in this project even a little bit. I say kudos to the Photobombers Crew and FPS people who made this event possible and to the attendees from the Philippine Institute of Architects (PIA - Davao Chapter). Although my time with the attendees was short, I realized that I miss sharing what I know with those starting out in photography. I hope this will be an annual event for the group.

credits to Bren Ang for the group hug

PS: I find the new flickr upgrade as cool but a bit confusing at first. It is nice that I can view all my photos and download the original resolution images from wherever. I have yet to check out the new android app.

Friday, October 12, 2012

on Work and Play

The problem with work is that it interferes with your hobby. I still have some photos from my September shoot that I need to post process but I do not have the luxury of time to do so. I had a hell of a week and now I realized I haven't even touched my camera since my last shoot.

Now that I have some breathing room, I am posting two more images from my last shoot.

The first is from the main model Kitty. I don't usually take this kind of upward angle shot that fills the frame. I like a bit of negative space but this one turned out nicely with the rembrant-ish lighting setup.

portrait top (1 of 1)

The second photo is from a light setup test that turned out quite nicely with Kate who was the stylist, makeup artist and talent manager for that shoot. Having the soft box so close to the model really does produce good results. This was done with a two light setup with the soft box to the right of the model and another strobe to light up the background a bit.

b&w studio (1 of 1)

There are quite a number of keepers from this shoot that I'd like to publish in the coming weeks granting that I have the time to edit them. I have yet to start on the set with the second model of this shoot. But this weekend, I promise to take my camera out for a walk first because it is that time of year again that photographer from all over the world would be out on the streets for the annual Scott Kelby World Wide Photowalk. I hope I get some keepers this weekend for the contest and for content in this blog as well.

Wish me luck.

Friday, September 14, 2012

on Revisiting Claire

I should make it a habit to revisit my previous sets.

Last night, I found some unprocessed keepers from a shoot that happened about six months ago. I was bored and there was nothing good on TV so I decided to do some quick post processing. And since a lot of my previous posts were in black and white, I went with some colors for this one.

silhouette (1 of 1)

I really need to work on my post processing skills especially when doing color adjustments. I still haven't found the right mix for those vintage looking photographs. I have some scripts that I tweak to my liking but it isn't as consistent as my B&W photos. I guess there are just too many variables in color photography; or I am just too lazy to post process photos until I get the hang of it.

vintage (1 of 1)

Anyway, I have some more photos from this set that I would like to publish. I just need to find the time to work on them. For now, I'll be busy with some other stuff like taking a class picture for a graduating class and an upcoming portrait shoot.

Sunday, May 13, 2012

on Summer Beach Getaways and Processing Portraits

Photography is like cooking, when you overcook something it wouldn't taste good. But leaving it raw can be a good thing.

We had our annual summer beach overnight with photographer, model and makeup artist friends in Talicud Island last weekend. It was yet another fun-filled stay in a beach where there is no electricity or running water and can only be accessed by boat. And of course we still had the usual sunset beach shoot. But this year we weren't so lucky because the sunset was shorter than what we normally expect during the summer months.

keyt (3 of 3)

I decided to go against the norm for summer beach shoots and aim for black and white. I knew most photos from my photographer friends would come out in color because it is in the beach and around sunset plus you have a lovely model with nice skin tone. Well, going against the grain is what I am known for anyways so I might as well stay that way. And simple is always better for me. I don't need for it to be razor sharp or for the contrast to pack a punch. I just want my photo to retain the character of my model.

keyt (2 of 3)

And I will never over process because I'd lose the essence of the portrait and get some sort of digital Frankenstein. It is a common mistake which photographers without their own personal styles make. They do all sorts of Dave Hill, Rarindra Prakarsa, Luko or Manny Librodo sharpening and stop only when they think its all there. For me HDR and portraits don't go well. And all those unnatural looking eyes and skin tone seem like they have been inspired by horror flicks. Funny thing is they spend hours and hours just to get THAT look. ** insert face palm here ** Experimenting is good but knowing how much post processing can be applied is what works best especially for portraits where you really have to retain the personality of the model.

keyt (1 of 3)

A little color efex and totally rad action scripts here and there plus a bit of preset editing from lightroom and I am done. A good photo is a good photo even when it is unprocessed and no amount of post processing will make a bad photo look good. Just like a steak is good when it is rare or medium rare and ruined when it is well done.

kate (1 of 1)

Once again, thank you to Kate for being a fabulous model. To Karina Asetre and Kaye Garino for the makeup and styling. And to the Photobombers for another successful summer getaway.

Saturday, April 14, 2012

on CS6, Tunnels and Portrait #30

One photo will make your day...

You can quote me on that statement above. I have said it before and always say it when shooting models or clients. I just need one photo to make my day. Everything else I shoot will just be for posterity sake. I mean, I am already there so might as well shoot some more right?

And last night I really thought I had a lot of time to edit an entire photoshoot set from a month ago. But then I selected my first photo, I didn't stop tinkering until I got what I really wanted out of it. I spent about an hour and a half doing stuff I normally don't do in photos like removing stray hair and all those portraiture stuff. Well, I guess there is a first for every thing.

Oh, and I did it in Adobe Photoshop CS6 Beta release. And I had so much fun because everything was faster and smoother. I learned how to use the color mode in the clone stamp tool and the new feature which is content aware move tool. But I didn't really move the subject around with the tool, I just extended the photo a bit to look more pleasing (in that rule of thirds kind of way). And the action scripts I use don't freeze my laptop anymore.

For those wondering how this shot was done. It was shot using my trusty Nikon D7000 and a Nikkor 85mm 1.8 AFD @ f1.8 and ISO 500 in ambient light. This was shot in a tunnel and I wanted to get the right light to expose my subject as well as the light from the other end of the tunnel for that starbust like effect. I am really liking the 85mm 1.8. I hope I can get one by the end of the year.

The model by the way is Mary Claire whom a co-shooter met while walking his dog. she does professional modeling here in the city. One this I really like about her is her confidence and easy going attitude. Well, come to think of it, those who get into my 100 Portraits project are all easy to work with.

 Portrait #30: Mary Claire

pano portrait (1 of 1)

PS: Special thanks to Karina Asetre for the makeup and styling and as usual the Photobomber Crew for the Shoot. Do like the Photobomber Crew Facebook page.

Saturday, March 10, 2012

on Prom and Portrait #28

Seriously, what are they feeding teens these days?

My friend asked me to do a shoot for her sister about a month ago because it was her highschool prom and she wanted to have a souvenir of sorts for that special occasion. I didn't hesitate to say yes because I have always wanted to take a portrait of Adreane for my project. I saw her on facebook and I knew I wanted to add her to take a portrait of her.

adreane portrait (1 of 2)

And then I was surprised to see a tall lady instead of a blooming teen.

She is still sixteen and in highschool and I was thinking I would be shooting something that was more on the teen(y) side. And so my plans went out the window when I saw how matured she looked. It was a good thing that I quickly found out her angles and got to the business of doing her photoshoot. It is her first time but she got the hang of posing and how to project in front of the camera. I am glad she was comfortable during the shoot.

adreane portrait (2 of 2)

While reviewing the shots I took, I realized how different it was from what I originally envisioned. And I am glad I still pulled it off. Like what I always say to my models, I only need one shot to make my day. And after post processing only a handful of shots, I can say I had two (or more) keepers on that day. I will go back for a second look at this shoot when I find some time.

Here is the portrait I will add to my project. I had a hard time choosing between the B&W photo and the one I chose because I think both are good enough to be in my portrait project. I decided to take this closeup as it is a bit more unique. Plus I love the reflection in her eyes.

Portrait #28: Adreane
adreane portrait (1 of 1)

PS: Special thanks to Amylae for inviting me to do the shoot.

PPS: This is a late post because I have been swamped with projects this past month. I wish I can shoot and post process more often in the coming days.

Thursday, February 9, 2012

on Comebacks and B&W

It's been awhile since I've done portraits... well, portraits for my portfolio that is. I've been shooting for clients lately. And with clients, you don't really get to do much experimenting; it's always about the tried and tested formula when you are paid.

So, here is my comeback shoot.


aubrey (1 of 2)

I've done a whole lot of black and whites in my portraits. I can't recall the last time I went for the overexposed film look. Well, it fits the concept quite well in my opinion. We were shooting in a plantation and I really hate it when there is too much greens and not a whole lot of other things. I was tempted to do muted (desaturated) or cross processed output but I decided to go overboard and killed all the colors. I experimented with the infrared preset in Lightroom and changed the values a bit on this set. Reminds me of the overexposed shots I had when I was still learning.


aubrey b&w (2 of 2)

Well, I still like how it turned out. Oh, and there’s more to come as I am not yet done with the portrait that I will add to my project. And I'll tell you about the model in my next blog.

PS: thank you to Miss Kaye Garino for the makeup and the photobomber crew for the shoot.

Wednesday, November 30, 2011

on Revisiting Dannica

"Seek and you shall find..."

At the request of Dannica, I revisited her shoot to look for one more photo she could use as portfolio for a contest. I found this particular photo. At first it was a bit over exposed but I liked how her beauty radiated through with the setting sun behind her. So I went to do some post processing on it to see what it would look like. And after about an hours worth of tweaking the levels and exposure, I found what I was looking for. Its still over exposed but in a good way. This photo was indeed a diamond in the rough. And I am left wondering why I skipped it before.


Spurred on by this photo, I'll be revisiting some of my other shoots and perhaps I'll be able to find more hidden gems. And since my archives is over a 100gb, I am sure that the odds of finding workable photos are high. This is also a good practice for my post processing skills.

Tuesday, November 22, 2011

on Portrait #24 in High Key Mono

"One very important difference between color and monochromatic photography is this: in black and white you suggest; in color you state. Much can be implied by suggestion, but statement demands certainty… absolute certainty." -- Paul Outerbridge

Most of my friends say I shoot better in black and white. I don't really intend to shoot everything in black and white but it admittedly does makes my photos more interesting. I have found that I tend to process my ambient light shots in color and my strobist shots in black and white. It probably has something to do with my preference in shooting. I tend to find it easier to shoot in ambient light than with strobes. Although I get more flexiblity when I control the light, I find it much simpler to just find a steady light source. Or probably I just hate setting up the lights. Plus it is easier to balance my lighting when it is an ambient light source.

Here is the latest addition to my portraits project in High Key Black and White. Simple white background, 3 lights and my model Aya. Shes still in highschool but works as a part time ramp model. Its always fun when you have a cheerful model who easily adjusts to the shoot. We had a ton of laughs while doing the shoot.

Portrait #24: Aya

  B&W (1 of 1) 

And it is the first time that we used my house as location for a shoot. I started thinking of putting up a makeshift studio in the garage during the Christmas break. Hopefully, I find the resources and time to do it.

PS: special thanks to Karina Asetre, our MUA and Stylist for this shoot.

Wednesday, October 5, 2011

On Black and White Treatments and Portrait #22

Life is a lesson, you'll learn it when you're through.

Photography for me is an endless learning experience. I shoot macro and learn new things about insects and flowers. I shoot portraits and learn about the person I am shooting. And after shooting, I decide on how to post process a photo. And since I am still in the stage where I do not have a permanent workflow, I experiment on techniques; and again I learn new things.

And in the photo I am going to show, I learned that having a Sepia layer on top of the traditional Black and White layer makes the B&W look softer. I tried different opacity values and layer arrangements. Experimenting on the treatment is as fun as researching things about my macro subjects; and takes up as much time.

The day that I stop learning in photography is the day that it will become boring.

Portrait #22: Genie
love is color...


A little something about Genie, she is a model and singer. As you can see, she is really pretty and she has a voice that is as pretty as her face. She is always seen in product launching events and other events with models. She is probably as busy as I am and this is only the second time I had the chance to shoot her as she is busy with all her gigs.

Monday, September 26, 2011

On Different Light Sources and Portrait #21

Always go where the light is...

Lets face it, photography is about light. And I have observed that all great photographers understand light. If you do not know how to use light sources to your advantage then you wont go far in photography.

And in this particular shoot, I had 3 different sources.

First, we were bored waiting for our co-photographers who were doing a client shoot so we decided to play around with two portable light: a battery powered LED array and a circular florescent light powered by a car battery. And we also had the headlights of the car we had with us. So we found something workable and I managed this single image. Note that there is some flaring due to the fact that I was shooting straight into the car's headlights which we used as sort of a rim light.

Stranded
portraits (1 of 3)


Second, we were waiting for the crew to set up the lights so the model asked me to shoot her inside the coffee shop. The place had an assortment of lights. Just in the stairs they had three different warm lights. This image is what I got from that set. I changed the image to a colder tone since I wanted to accentuate her hair color.

Framed
portraits (2 of 3)


Lastly, we played around with strobes and colored gels. We had a strobe with CTO gel (color temperature orange) and bare strobes diffused by a white reflector. I turned it into something vintage because the orange gel already played a lot in setting the tone of the shot. This is also the image I will add to my portraits project.

Portrait #21: Krizha
portraits (3 of 3)


A little background on the model. I met Krizha through a good friend and always wanted to shoot her. When she sent me a message asking for a shoot, I instantly accepted since I wanted to add her to my project. Aside from modelling, she also sings and has a band. This is one talented girl. I promised her a reshoot and I hope that will push through. Hopefully, the next shoot will just be in ambient daylight so I can do much more as that is where I am most comfortable in.

Tuesday, July 19, 2011

On Shadow Play and Short Lighting

There is a sense of mystery when something is hidden in the shadows...

I've have long been a fan of drama in lighting. You elicit emotions in your viewers even when your subject doesn't show any. The move from light to shadow and how certain parts are lighted and hidden from the viewer makes a photo more interesting to look at. It seems that the subject's beauty comes out more with the lighting.

In this particular set, I did short lighting and made it low key so that I'd get a lot more shadow play. Short lighting is when you illuminate part of the subjects face that is turned away from the camera. I wanted to make it very dramatic by using shadows to hide part of the model's face or body. I got some good shots but had some problem during post processing. I guess I still need to practice on controlling light spills and other things. I'll get better as I go along.

Kaye Short Lighting
kaye portraits (1 of 1)

Maggie Short Lighting

Sunday, June 26, 2011

On Beauty Shots and Portraits #14 & #15

Its been a while since I last had a chance to write a blog. I've been preoccupied with all the other stuff in my life. I have had a ton of backlogs and some finished output waiting to be blogged. But since its raining outside again, I'll shoot a quick one.

We had a shoot last Friday complete with studio lights. I wanted something unique for my portraits project so I ended up processing two portraits as beauty shots. Normally, I wouldn't go for beauty shots since I am used to doing full on portraits. I'm not used to chopping off the head and shoulders so that the focus would be on the face. And I prefer a different lighting setup too. But sometimes, breaking the habit makes it all worth while. And I am happy that I have two new faces to add to my portraits.

Portrait #14: Roj
roj portrait (1 of 1)

Portraits #15: Mylz
mylz portrait b&w (1 of 1)

PS: Special thanks to Kaye Garino for the awesome makeup and Richard Amora for the studio lights.

Tuesday, June 7, 2011

On Post Processing Hell and High Key

I have this habit of looking for leftovers inside the fridge in the middle of the night and making a meal out of what I find. It's something I have been doing since college and I usually write blogs while I'm eating; it helps me think better.

Last night, I did something similar. I scanned my old archives for shots I haven't done any post processing on. I actually found a couple of whole shoots that were left unprocessed. Most were dated around November to December last year. Back then I had photoshoots every weekend. The set I chose was one sandwiched between a prenup shoot and volunteer work. I have been trying to find time to do some light post processing for this shoot but newer shoots keep coming up and it gets stuck in the back burner.

In the IT industry, we call projects that are stuck in the back burner as being in the "Development Hell". I'll call this "Post processing Hell" since the shoot has been done but the photos never got to the post processing stage.

Well, I made some progress last night and found some pretty interesting shots of Anne. The photos belong to the High Key session (our group refers to shoots either by the name of the model or the concept); I never got to publish any of the shots from that session. I applied some of my newer post processing workflows to this set; my workflow from November last year didn't really do much to get the most out of my shots. A few plugins here and there, some clone stamps, and then some cross processing and B&W conversions later, I got some quality output. Funny, how a little post processing can go a long way.

I should do this more often as I think I am doing a better job post processing some time after the shoot than having to rush my output. But then again, I don't want my shoots to end up in limbo for a long time.

High Key B&W
Anne in B&W

High Key
plain (1 of 1)

Cross Processed
Anne Cross Processed